Time to put the suspension and wheels back on this load of old silly nonsense that I sometimes jokingly call a model, It's been so long since I cut them all off that I can't even remember why I cut them off, probably something to do with painting, probably to make it easier to paint the backs of all the wheels and suspension units with an airbrush, but anyway, spacers were made from plastic card to replace the missing plastic that I butchered out with a Mini-craft tool, and things got glued back on, and then a few wheels got taken off again...

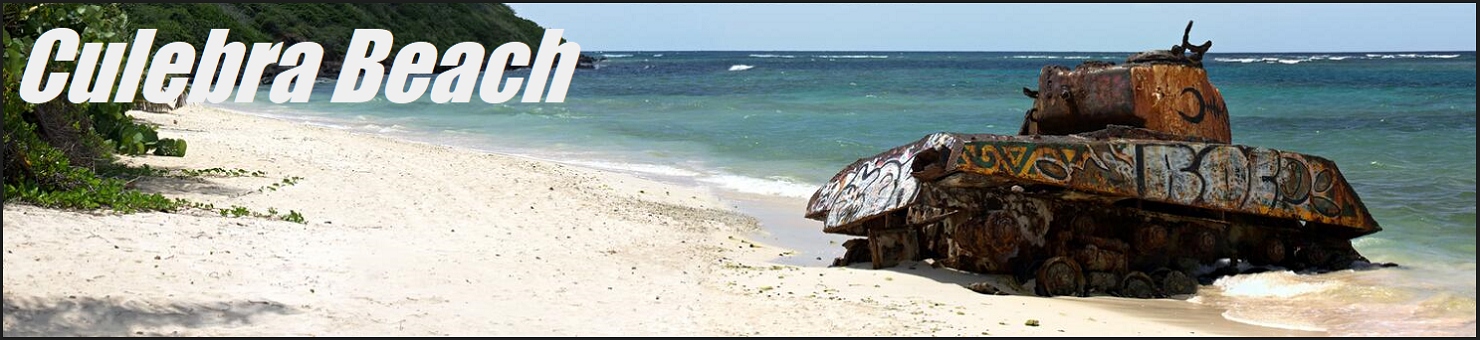
Picture above, this is what the suspension and wheels looked like long ago, and at the time I just threw the wheels on wherever I could, and as quickly as I could, mostly just to get a quick picture, and the other side was only partially done if I remember correctly, so it's fair to say that things don't look much like this anymore, and this time I've made an effort (but not too much effort) to transition the corrosion and carnage towards to the front, as that's kinda how it is on this Culebra beach wreck, so we get more tyres and slightly less damage at the back end, and then all hell (in terms of damage and corrosion) breaking loose towards the front end.

Picture above, while putting the suspension and wheels back on I also finished painting the bottom of the lower hull, this area was a complete disaster zone of epic proportions to be honest, there was bare plastic, Mr Surfacer and all kinds of nonsense on the hull bottom, mainly because I was using this area as a test zone, so I tidied it all up and blended everything in.

Pictures above, and we ended up with this, which is basically some heavily damaged and corroded HVSS suspension on both sides of my very rusty/dusty brown and orange Sherman tank, some of the wheels on the left hand side will be buried in sand on a base (hopefully/maybe) and so they won't be visible and don't really matter all that much to be honest, It depends on how much I decide to bury the damn thing in sand I suppose...

Pictures above and below, this is what happens when you go a little overboard with rusty dusty using very light pastels and sand that has been through the mortar n pestle, but don't worry, nothing is fixed in place, it mostly just brushes off again, and after looking at these pictures I maybe wish that I had stayed with Tamiya NATO black, which would leave the tyres with a more greyish sun faded and bleached look, which I think I prefer to be honest, but I suppose I can always lighten them up later if I want.

Picture below, the small stand that I scratched from plastic card a while back to hold the model at an angle had to be enlarged somewhat as things were getting a little wibbly wobbly now that the suspension and wheels are back on, the new base will probably morph into something that might or might not involve sand, we shall see.

Picture below, the tyres worked out quite well I think in terms of damage and the bits of tyre that have come away in chunks, this is about the only time that separately moulded tyres in a model kit are of any use I think, so well done Dragon, all is forgiven.

And that's about it for now, the picture above shows that I'm still messing around trying to do sun baked sandy patches with artists oils, without much success it has to be said, I've managed to do two that I actually vaguely like, It seems to be hard to get consistent and repeatable results, It's all a bit hit n miss at the moment, with more miss than hit, but the whole tank is covered in these sandy patches so I need to stop drinking shandy, put my big boy pants on, and get it sorted out sometime soon(ish) but anyway, I'm starting to quite like this load of old rusty nonsense now, It's kinda growing on me slowly, a little bit like rust.
Matt

No comments:
Post a Comment
Note: only a member of this blog may post a comment.